Pristine Walls Guide: Expert Handyman Tips for Wall Repair and Drywall Installation
Handyman Tips guide through the comprehensive process of repairing or installing drywall for a high-…….
Handyman Tips guide through the comprehensive process of repairing or installing drywall for a high-quality finish, emphasizing the importance of meticulous inspection and preparation. Begin by evaluating the wall's condition to identify any damage, then proceed with appropriate repairs, from patching minor issues to replacing larger panels as needed. Professional help is recommended for significant structural problems. Preparation is key; ensure the walls are smooth before applying joint compound, which should be applied in thin layers and sanded between coats. After thorough sanding, clean the area and apply a high-quality drywall primer with a paintbrush or roller, allowing it to dry according to the manufacturer's instructions. Use a short-nap brush or roller for smooth paint application, applying thin layers and checking that each coat dries completely. Maintain consistent temperature and humidity levels during painting to ensure the best finish. Light sanding may be necessary between coats to remove imperfections. The final result should be a polished, durable surface ready for the finishing touches of painting or wallpapering, achieving a high-quality finish that stands up to close inspection.
When walls show signs of wear or damage, achieving a polished finish post-repair is key to maintaining a pristine interior environment. This article guides readers through the essential steps of assessing wall damage, mastering drywall repair techniques for a smooth surface, and perfecting installation for an immaculate finish. With handyman tips sprinkled throughout, it offers a comprehensive approach to achieving a seamless, polished look. Dive into the intricacies of sanding, priming, and painting drywall to transform your walls from lackluster to luxurious.
- Assessing Wall Damage Before Repair: Understanding the Scope of Repairs Needed for a Polished Finish
- Step-by-Step Guide to Effective Wall Repair Techniques for a Smooth Surface
- Mastering Drywall Installation: Ensuring Precision and Quality for an Immaculate Finish
- Achieving a Seamless Polished Finish: Tips and Tricks for Sanding, Priming, and Painting Drywall
Assessing Wall Damage Before Repair: Understanding the Scope of Repairs Needed for a Polished Finish

When contemplating wall repair or drywall installation for a polished finish, a meticulous assessment of the wall damage is paramount. Homeowners and professionals alike should inspect the extent of the damage to ascertain the necessary repairs. A visual examination can reveal cracks, dents, water stains, or other signs of wear that may affect the final appearance. Handyman Tips advise starting from the topmost point of the wall and moving downwards to identify any issues that are not immediately visible. This systematic approach ensures no underlying problems remain undetected, which could compromise the polished finish you aim to achieve.
Once the damage is identified, it’s crucial to determine the scope of repairs needed. Minor imperfections may require simple patching techniques, while more significant damage might necessitate a complete panel replacement. For surfaces with deep gouges or structural compromises, professional guidance is recommended. Handyman Tips emphasize that preparation is key; walls should be smooth and even before applying joint compound or drywall mud. This step is critical as it directly influences the quality of the final finish. Subsequent sanding, priming, and painting must be performed with precision to achieve the desired polished look, reflecting attention to detail and a commitment to excellence in the repair process.
Step-by-Step Guide to Effective Wall Repair Techniques for a Smooth Surface

Mastering Drywall Installation: Ensuring Precision and Quality for an Immaculate Finish

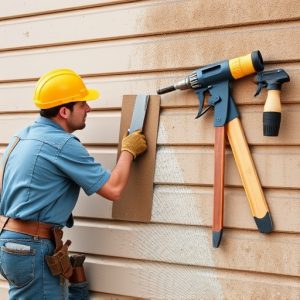
When undertaking wall repair or new drywall installation, precision and quality are paramount for achieving an immaculate finish. Handyman Tips emphasize that the foundation of a polished end result lies in meticulous preparation and execution. Begin by carefully measuring the area to ensure that the drywall sheets fit perfectly without gaps or overlaps. Use a drywall square and carpenter’s level for accurate measurements, and mark the cutting lines with a sharp utility knife. When cutting the drywall, score the surface with the knife before snapping it along the marked line for a clean break. For intricate cuts or curves, a drywall saw or jigsaw with a fine-toothed blade can be invaluable tools.
Once the drywall is in place, Handyman Tips advise that you should proceed with a smooth and seamless finish. Begin with a thorough sanding to remove any sharp edges or imperfections from the drywall joints. A fine-grit sanding block or orbital sander will facilitate a smoother surface. Following the sanding, apply a high-quality joint compound using a mud knife or drywall knife to fill seams and cover screw heads or nails. Apply multiple coats as necessary, allowing each layer to dry completely before sanding again for an even, glass-like finish. Between coats, a light dusting with a vacuum or tack cloth ensures no residue interferes with the bonding process. With these careful steps, your drywall installation will be solid and ready for the final touches of painting or wallpapering, resulting in a professional, polished look that will last.
Achieving a Seamless Polished Finish: Tips and Tricks for Sanding, Priming, and Painting Drywall

When striving for a seamless polished finish in drywall repair and installation, the devil is in the details. Begin with meticulous sanding; use fine-grit sandpaper to smooth out all seams, edges, and joints until they are flush with the surrounding area. Ensure that corners are sharp and clean, and any patches or repairs blend seamlessly with the existing drywall. Dust should be completely removed after sanding; a damp cloth or vacuum with a HEPA filter is ideal for this task to avoid leaving residues that could affect the final finish.
Priming is the next critical step. Apply a high-quality primer designed for drywall, using a smooth, even stroke with a paintbrush or roller. This primer not only seals the surface but also provides a uniform base for the topcoat, essential for achieving a polished appearance. Allow ample time for the primer to dry as per the manufacturer’s instructions. Once dried, choose a high-quality paint and apply it with care. Use a brush or roller designed for a fine finish; its nap should be short and dense to avoid leaving lint or marks. Apply the paint in long, smooth strokes, overlapping previous passes slightly to ensure full coverage. Let each coat dry completely before applying the next, building up thin layers for the best result. Handyman Tips suggest that maintaining a consistent temperature and humidity level during this process can prevent issues with drying and adhesion. Remember to sand lightly between coats if necessary to remove any imperfections or brush marks, and always allow the final coat to cure completely before assessing your handiwork. With patience and attention to detail, you can achieve a polished finish that will stand up to close inspection.
When it comes to achieving a polished finish in wall repair and drywall installation, the key lies in meticulous preparation and execution. This article has outlined the critical steps necessary for assessing damage, mastering repair techniques, and ensuring precision in drywall installation. By adhering to the guidelines provided for sanding, priming, and painting, homeowners and handymen alike can achieve a seamless, refined look that enhances the aesthetic appeal of any space. Remember, the pursuit of a polished finish is as much about attention to detail as it is about employing the right techniques and tools. With these insights and tips at your disposal, your next wall repair or drywall installation project can result in a flawless surface that stands the test of time and usage.