10 Essential Handyman Tips for Mastering Home Repairs
Handyman Tips highlight the essentials of a well-equipped toolkit for effective home repairs, emphas…….
Handyman Tips highlight the essentials of a well-equipped toolkit for effective home repairs, emphasizing that the right tools can prevent minor issues from escalating. A reliable set of pliers, wrenches, and a hammer, along with measuring tools, levels, and a cordless drill, are crucial for precision work and efficiency. Cutting tools like handsaws, reciprocating saws, and cable cutters are necessary for handling diverse materials. Safety is always a priority, so remember to wear safety glasses and gloves. Additional critical tools for a comprehensive handyman kit include screwdrivers, a utility knife, chisels, an insulated voltage detector, a multimeter, bits and bit holders, a claw hammer, and a putty knife. Handyman Tips also cover practical solutions for common household issues, such as fixing leaky faucets by identifying the leak source and applying multiple thin coats of paint for a flawless finish. For electrical troubleshooting, always prioritize safety and consider professional help for complex issues. When dealing with loose tiles and deteriorating grout, Handyman Tips advise on careful tile removal, cleaning out the old grout, and applying fresh, mold-resistant grout for both aesthetic and functional improvements in your bathroom. These tips aim to empower homeowners to tackle various repairs confidently while ensuring safety and efficiency.
When home repairs loom, a well-equipped handyman can navigate the challenges with ease. This article equips you with practical tips for common issues around the house. From assembling the essential toolkit to achieving a flawless wall finish, and from clearing drain blockages to safeguarding against electrical hazards, these handyman tips are your guide to maintaining a comfortable and efficient home environment. Whether you’re tightening loose tiles or troubleshooting minor electrical concerns, the steps outlined will help you address these tasks with confidence.
- Essential Toolkit for Every Handyman: The Must-Haves for Effective Home Repairs
- Unclogging Sinks and Toilets: Step-by-Step Guide to Clear Drain Blockages
- Faucet Leaks and Running Toilets: Identifying and Fixing Water Wastage Issues
- Painting Perfection: Tips for a Flawless Finish on Walls and Trim
- Electrical Troubleshooting Basics: Safe Solutions to Common Electrical Problems
- Loose Tiles and Grout Replacement: Maintaining Your Bathroom's Integrity and Appeal
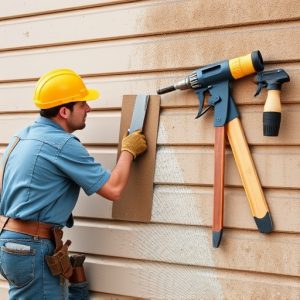
Essential Toolkit for Every Handyman: The Must-Haves for Effective Home Repairs

When it comes to tackling common home repairs, a handyman’s toolkit is the foundation of effective maintenance and improvement work. A well-stocked kit not only enhances efficiency but also ensures that minor issues don’t escalate into major problems. At the core of every handyman’s essential toolkit should be versatile instruments such as a reliable set of pliers, adjustable wrenches, and a sturdy hammer. These tools are invaluable for a multitude of tasks, from tightening loose fittings to driving nails precisely. Beyond these basics, a handyman must have measuring tapes and levels for precise measurements and ensuring surfaces are flat and true. A drill/driver, preferably cordless for added mobility, is another indispensable tool, allowing for quicker and more secure fastening jobs. For cutting through various materials like wood, metal, or even PVC pipes, a good quality handsaw, reciprocating saw, and cable cutters are essential handyman tips tools.
Safety should never be compromised; thus, safety glasses and gloves are non-negotiable. A toolkit for a handyman is also incomplete without a set of screwdrivers in various sizes, both Phillips and flathead, to handle electronic device repairs or furniture assembly. A utility knife with a sharp blade is crucial for cutting through adhesive tape, plastic, wood, or even metal strapping. Moreover, a set of chisels can be used for more intricate carpentry work or removing old grout. For working on electrical systems, an insulated voltage detector and a multimeter are critical to avoid shocks and to diagnose issues safely. Lastly, a toolkit should also include a selection of bits and bit holders, a claw hammer, and a putty knife for finishing touches like patching holes or spreading adhesive. These handyman tips will ensure that your toolkit is comprehensive and ready to tackle any home repair task with confidence.
Unclogging Sinks and Toilets: Step-by-Step Guide to Clear Drain Blockages

When faced with a clogged sink or toilet, prompt action is necessary to prevent water damage and maintain proper plumbing function. A handyman can effectively tackle this common household issue using a combination of tools and techniques. To unclog a sink, start by removing any visible debris from the drain’s surface. Next, use a plumber’s snake or a bent wire hanger to gently probe the drain and dislodge the blockage. For a more effective approach, apply a plumber’s drain cleaner as per the product’s instructions, ensuring proper ventilation and adhering to safety precautions. If the blockage persists, proceed to remove the sink’s trap under a cleared space in the sink to avoid spills. Clean the trap and any accumulated debris, and reassemble the plumbing.
Similarly, unclogging a toilet involves a different set of steps. Begin by ensuring the water level in the tank is below the overflow tube to prevent accidental flooding. Use a plunger, pressing firmly and maintaining a seal around the drain to create a vacuum. For stubborn clogs, a handyman might need to try a second plunger, creating a double-plunge technique by covering the overflow hole with one plunger while using the other on the toilet bowl. If these methods fail, it may be necessary to remove the toilet for a thorough cleaning of its inner workings. Always remember to shut off the water supply and disconnect the toilet before handling in this manner. Handyman tips like these can empower homeowners to manage routine plumbing issues effectively, saving time and money. Regular maintenance and timely intervention can help prevent major blockages from occurring in the first place.
Faucet Leaks and Running Toilets: Identifying and Fixing Water Wastage Issues

When it comes to common home repairs, faucet leaks and running toilets are two issues that can lead to significant water wastage, driving up your utility bills and potentially causing water damage if left unchecked. Addressing these problems promptly is crucial for conserving water and maintaining a cost-effective household. A dripping faucet might seem like a minor annoyance, but it can waste hundreds of gallons of water annually. Handyman Tips advise homeowners to listen for the sound of leaking water, as it often signals a need for repair. If you notice water accumulating on fixtures or hear hissing sounds near faucets, it’s time to take action. To fix a leaky faucet, first, identify whether the leak is originating from the handle or the spout. For handle leaks, you may need to replace washers or O-rings; for spout leaks, sealing the base might suffice. Adjusting the valve seat or installing a new washer can typically resolve the issue.
Running toilets, characterized by the sound of water continuing to flow after flushing, are another prevalent source of water loss. This problem can be more subtle than a faucet leak but is often equally wasteful. Handyman Tips suggest performing a simple dye test to determine if your toilet is running. By dropping a few drops of food coloring into the tank and waiting for a period without flushing, you can check if the colored water appears in the bowl. If it does, your toilet is indeed wasting water. The common fix for this issue involves adjusting the float mechanism or replacing worn-out components like flappers or fill valves. These repairs are typically straightforward for a handyman with basic DIY skills, and the savings on your water bill will be immediate and substantial.
Painting Perfection: Tips for a Flawless Finish on Walls and Trim

When it comes to achieving a flawless finish on walls and trim, handymen and DIY enthusiasts alike can attest to the importance of preparation and technique. To begin with, selecting the right paint and materials is crucial for the outcome. Opt for high-quality paints that offer superior coverage and durability. Before applying the first coat, ensure that the surfaces are clean, smooth, and free from any peeling or flaking paint. Use a high-grit sandpaper to gently sand glossy or previously painted areas to create a uniform texture that will hold new paint better. After dusting off the area thoroughly, apply a primer designed for your specific surface; this step not only enhances adhesion but also helps in achieving an even color.
Once the primer is dry, it’s time to start painting. For walls, use a roller for large areas and a brush for cutting in around edges and corners. Begin by rolling from wet to dry paint to avoid unsightly lap marks. Overlapping previous strokes slightly will blend the colors seamlessly. For trim or woodwork, a brush with an angle or fillet tip provides better control for clean lines and detailed work. Apply multiple thin coats rather than one thick layer; this approach prevents drips and helps avoid the need for excessive touching up later. Between coats, allow ample drying time as recommended by the paint manufacturer. Lastly, when you’re satisfied with your final coat, gently sand with fine-grit sandpaper to remove any imperfections before applying a protective topcoat if necessary. With these handyman tips, you’ll be well on your way to achieving painting perfection on walls and trim.
Electrical Troubleshooting Basics: Safe Solutions to Common Electrical Problems

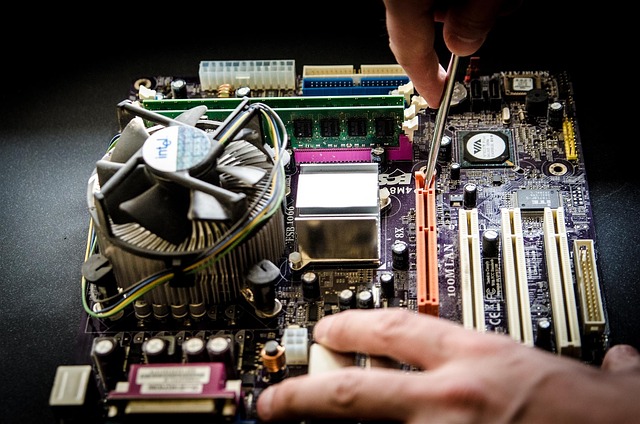
When dealing with electrical issues in your home, safety should always be your top priority. A handyman skilled in basic electrical troubleshooting can effectively address common electrical problems while minimizing risks. To safely tackle these concerns, start by turning off the circuit breaker that supplies power to the affected area. This simple step prevents the risk of electric shock and allows you to work without interruption. Common issues such as flickering lights, tripped circuits, or outlets not supplying power can often be resolved with a bit of hands-on knowledge. For instance, if lights are flickering, check for loose connections at the light fixtures or switches. Tighten any wires that seem loose, and secure the fixture to ensure a stable connection. If a circuit breaker keeps tripping, inspect the circuit for overloads; this could be due to too many devices plugged in or a short circuit. Reset the breaker after clearing the issue, and if the problem persists, consider consulting a professional electrician. Similarly, if an outlet isn’t working, ensure that the circuit breaker hasn’t tripped for it as well. Use a voltage tester to confirm that there is power supply to the outlet. If the outlet is dead, check the receptacle and the circuit breaker. Handyman tips advise replacing the outlet if it’s damaged or if none of these steps restore its functionality. Always remember to test each repair with the power on to ensure everything is functioning as intended. These handyman tips for electrical troubleshooting can help you confidently address common issues, but when in doubt, always err on the side of caution and call a professional.
Loose Tiles and Grout Replacement: Maintaining Your Bathroom's Integrity and Appeal

When it comes to maintaining a bathroom’s integrity and appeal, addressing loose tiles and worn-out grout is paramount. Over time, moisture and temperature fluctuations can cause tiles to shift, leading to potential water leaks that compromise both the structure and aesthetics of your bathroom. A handyman with expertise in tile work can effectively rectify this issue by carefully removing the affected tiles, cleaning out the old grout, and applying fresh, resilient grout to ensure a watertight seal. Handyman tips for this task include using a grout saw for precise tile removal to avoid damaging neighboring tiles and utilizing a putty knife or grout removal tool to clear out the old grout with care. Once the area is clean and dry, new grout can be mixed according to the manufacturer’s instructions and applied evenly across the joints. For best results, consider using grouts with mold and mildew resistance properties, particularly in high-moisture areas like bathrooms. This not only enhances the visual appeal but also ensures long-lasting performance, preventing future problems related to moisture penetration. By following these handyman tips for tile and grout replacement, you can restore your bathroom’s functionality and beauty with confidence. Remember to always wear protective gear such as gloves and safety glasses when handling tools and materials, and take the necessary time to clean up dust and debris to maintain a safe and hygienic environment.
homeowners can tackle a variety of common repairs with confidence by utilizing the handyman tips provided throughout this article. From assembling an indispensable toolkit to addressing faucet leaks, running toilets, and clogged drains, the guidance offered ensures a thorough approach to maintaining a well-functioning and aesthetically pleasing home. Whether you’re dealing with water wastage issues or revitalizing your walls with a fresh coat of paint, these practical solutions are designed to empower DIY enthusiasts. For electrical concerns, the article emphasizes the importance of safety first when troubleshooting common issues. Lastly, maintaining your bathroom’s integrity and appeal is simplified with tips on fixing loose tiles and replacing grout. With these handyman tips at your disposal, you’re well-equipped to handle a range of home repairs effectively.